


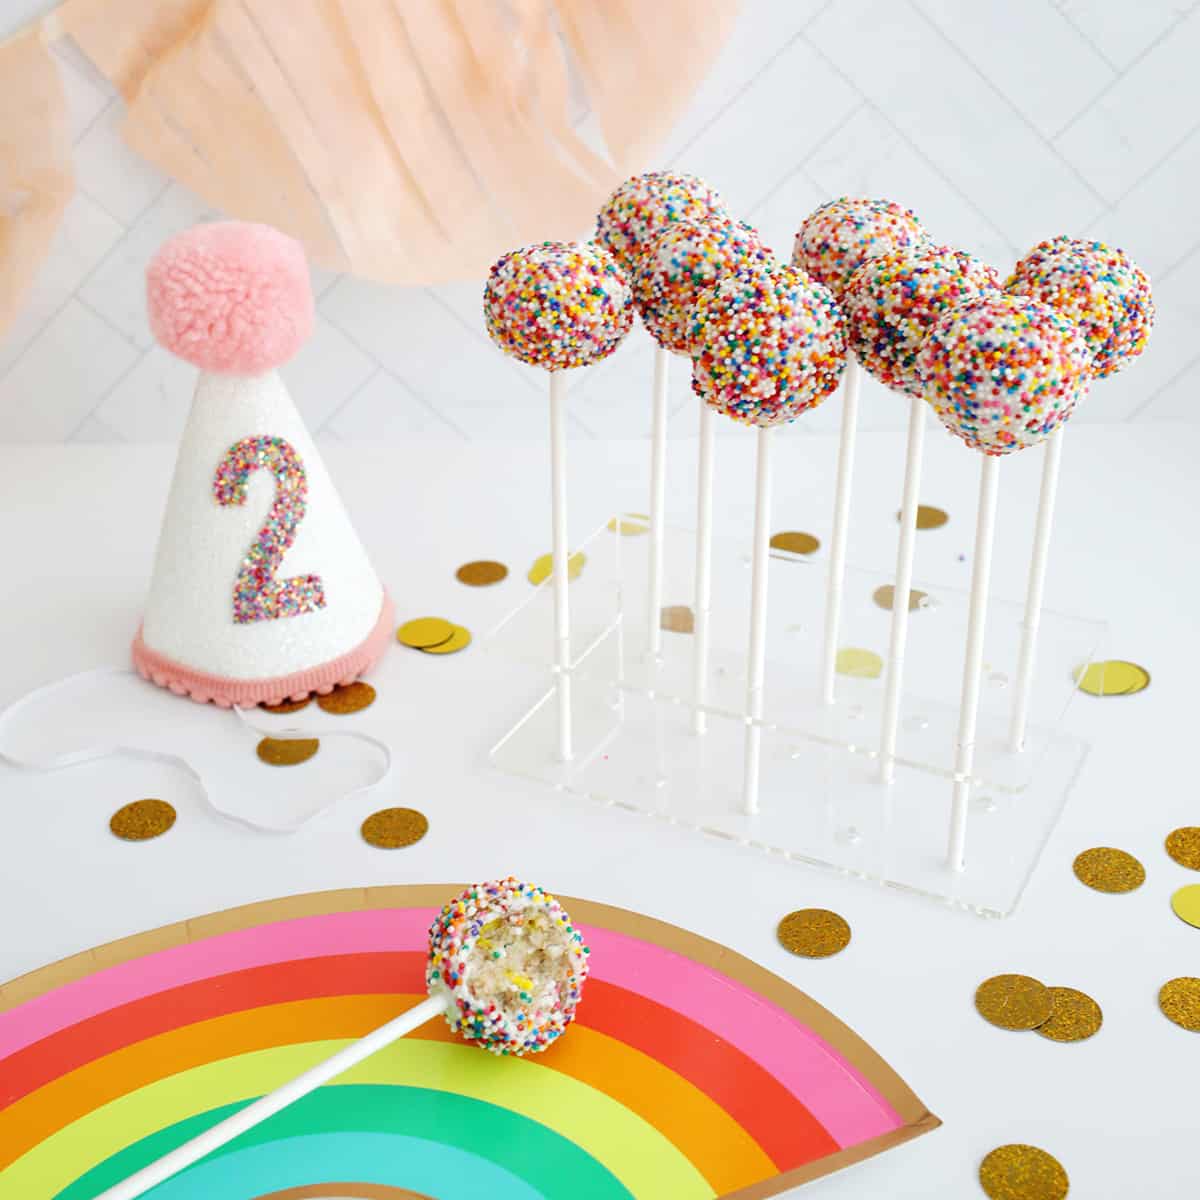
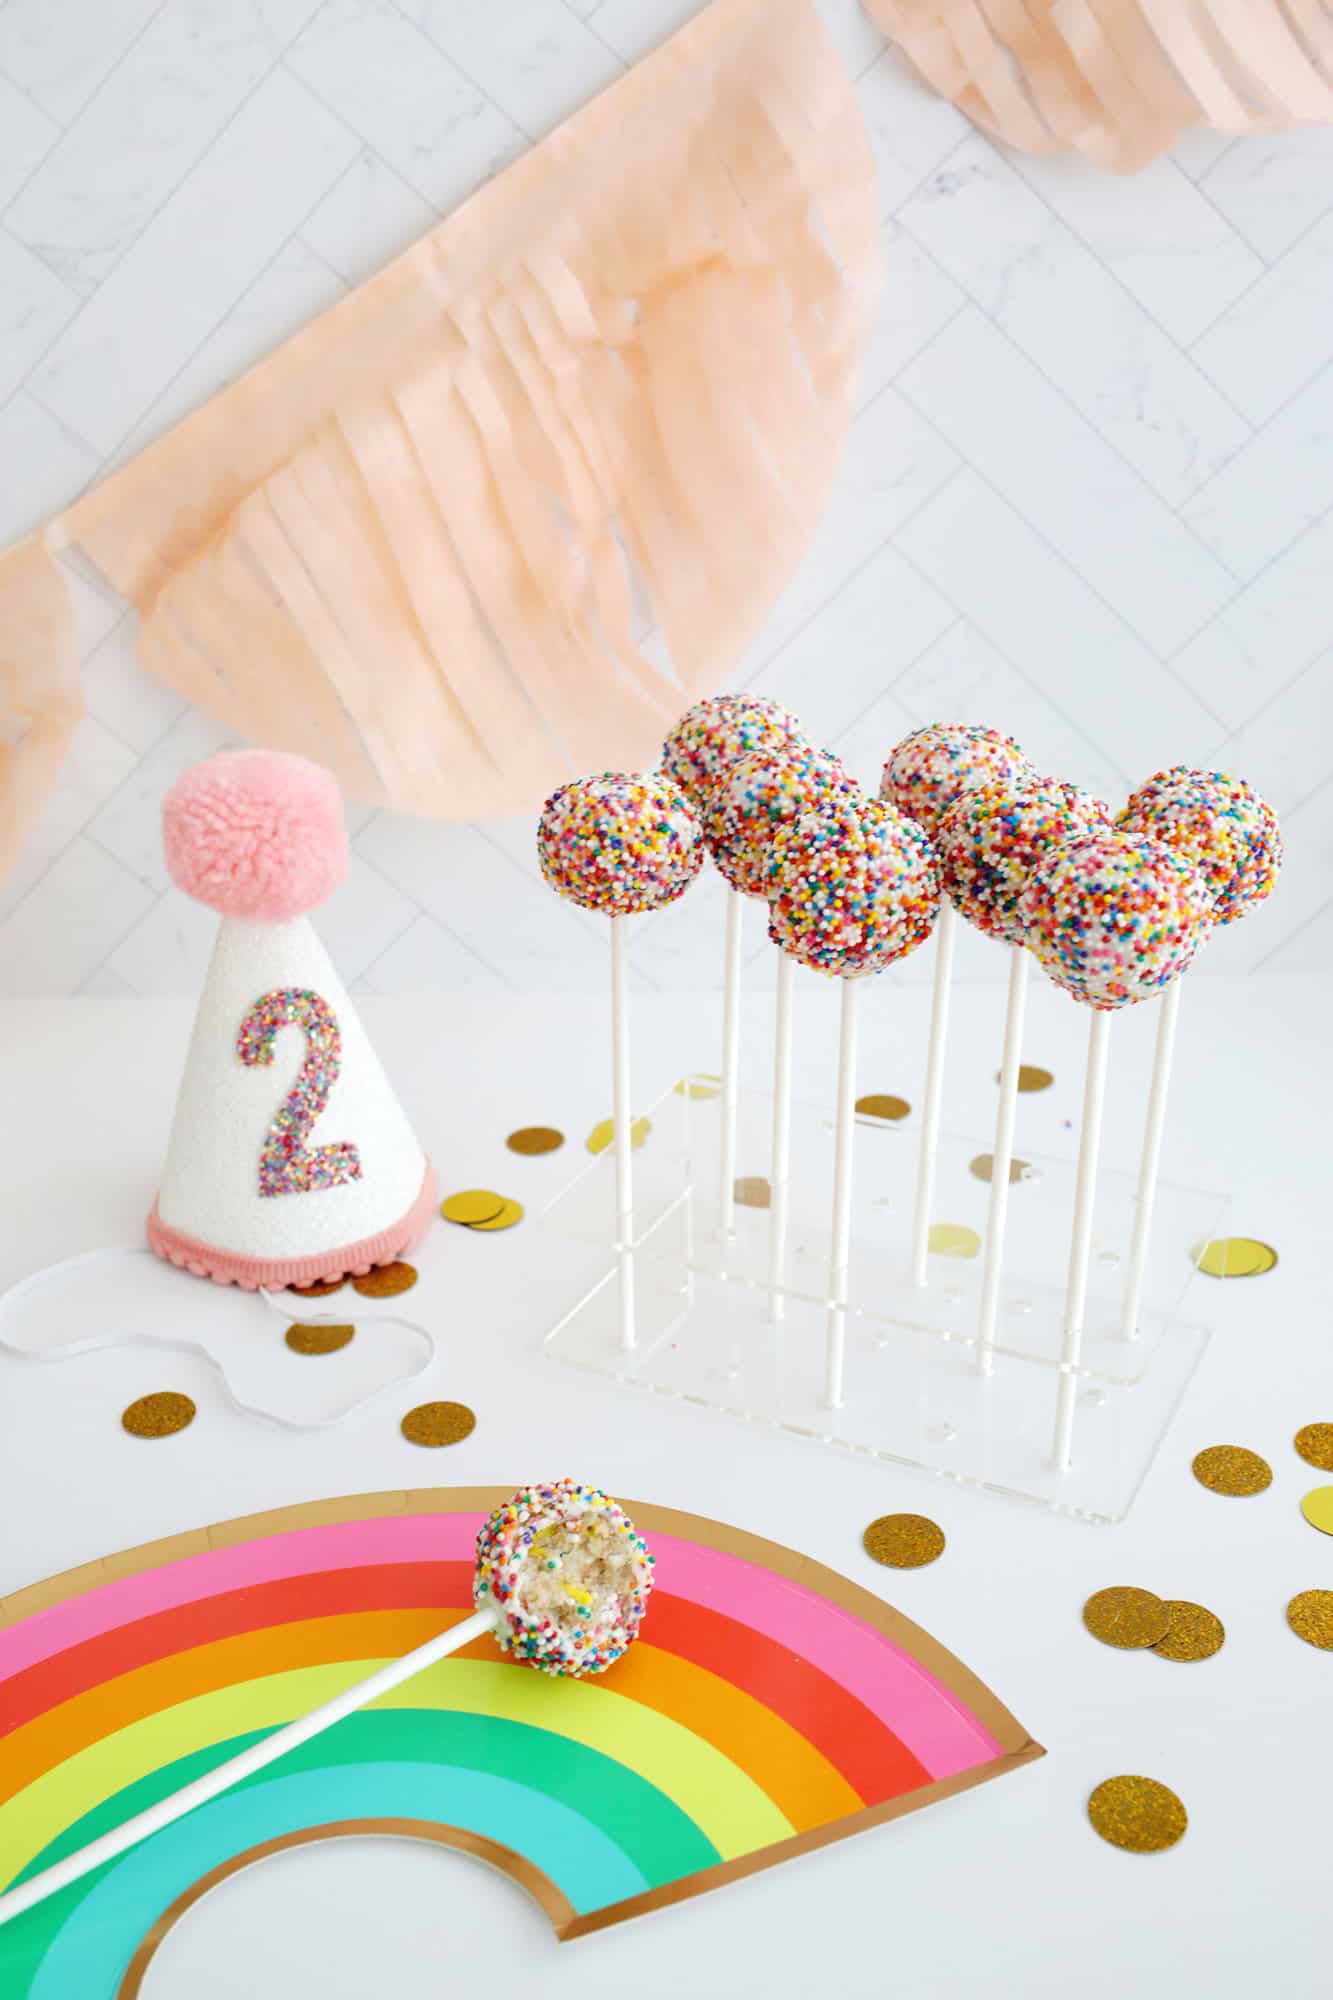
Birthday cake pops are the perfect treat of a bite-sized cake on a stick covered in chocolate and decorated with rainbow sprinkles. While these mini treats are perfect for kids’ parties, they’re also fun and colorful for any event (and for all ages!).
There are so many ways to make cake pops (try these) Oreo Cakes for a delicious no-bake option), but the Funfetti cake mix and number of sprinkles make them even more festive for birthdays and holidays.
Looking for more fun for your birthday? Check:
Tips for Making Cake Pops:
- Add your frosting to your cake crumble in small amounts so that you have just enough for it to stick. It should look like playdough.
- Use a small cookie scoop to scoop the cake mix to make equal portions for each cake pop.
- Make sure your cake balls are thoroughly cooled before coating them.
- Have your decorations nearby and ready so you can attach them while the chocolate is still melted.
- You can use a tall glass to pour your melted chocolate into (or melt it in a microwave-safe mug) so you have a small reservoir in which to completely submerge your cake pop.
Ingredients
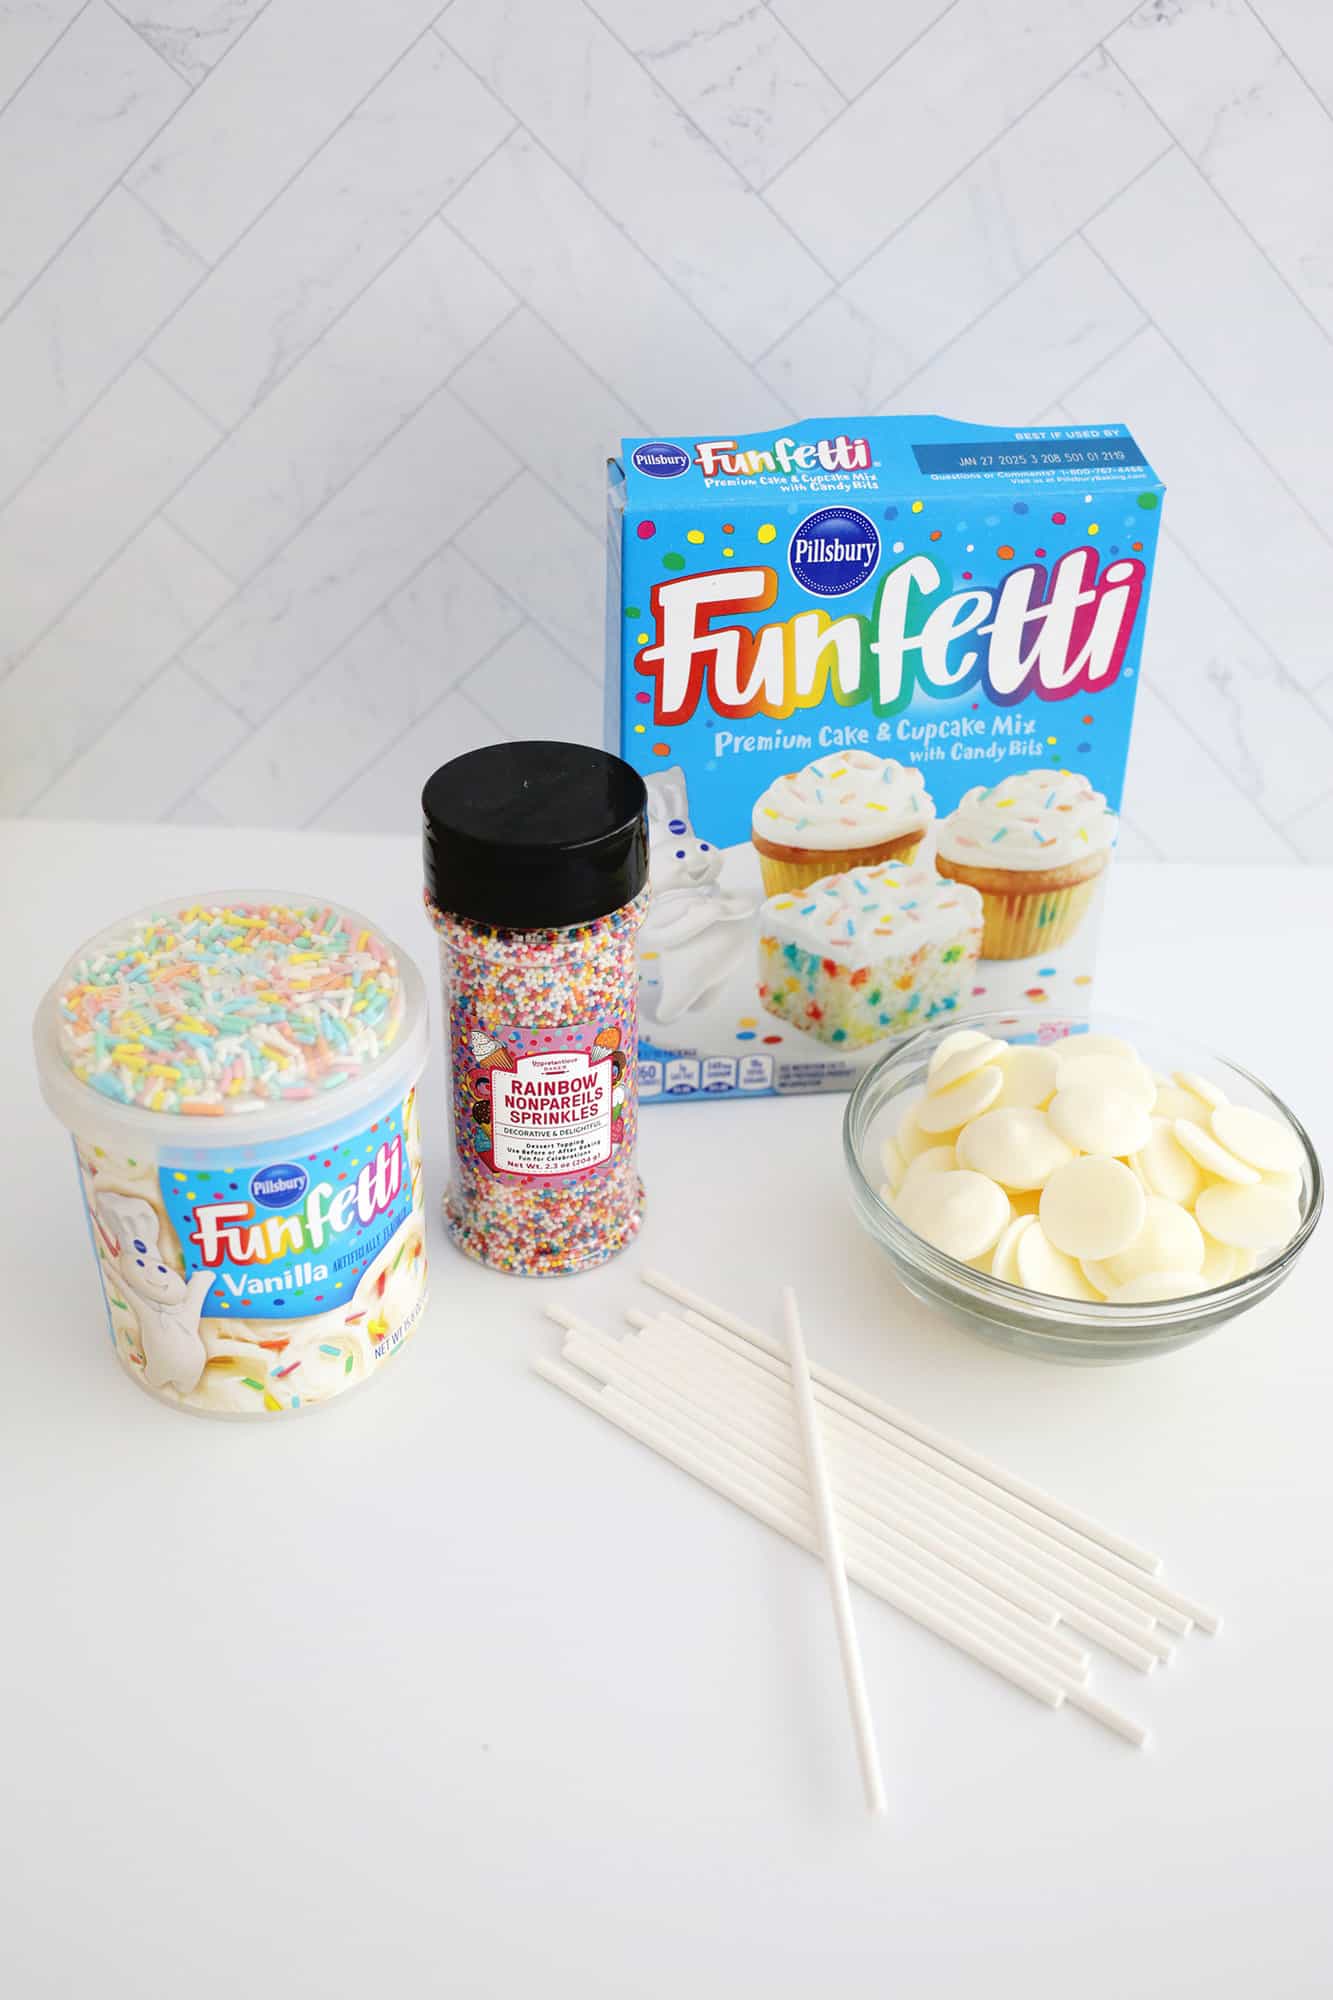
- Funfetti the cake mix: You can use any flavor of cake mix: chocolate, vanilla, red velvet, YELLOW, etc. but the Funfetti cake mix will have the added surprise of sprinkles inside. Be sure to check your cake mix to make sure you have the other cake ingredients the mix recommends for baking (eggs, oil, etc.).
- Box of vanilla frosting: You will also need a container of store-bought vanilla frosting. They also have Funfetti frosting if you want to up your sprinkle count, but you can also use plain vanilla.
- Cake pop sticks: Although it is more common to use stick like thisyou can also use forks or edible items like pretzel sticks!
- The white candies melt: These chocolate discs are the easiest way to get that chocolate coating because they melt easily and you don’t need to temper the chocolate.
- Glitter: This is part of what makes birthday cake pops so fun! You can use rainbow sprinkles Or unparalleled rainbow.
- Microwave or bain-marie: You can melt candy melts in the microwave, but you can also use a bain-marie do it on the stove or a chocolate melter like this one.
Looking for more cake pop tips? Check out our How to make cake pops for more!
How to make birthday cake pops:
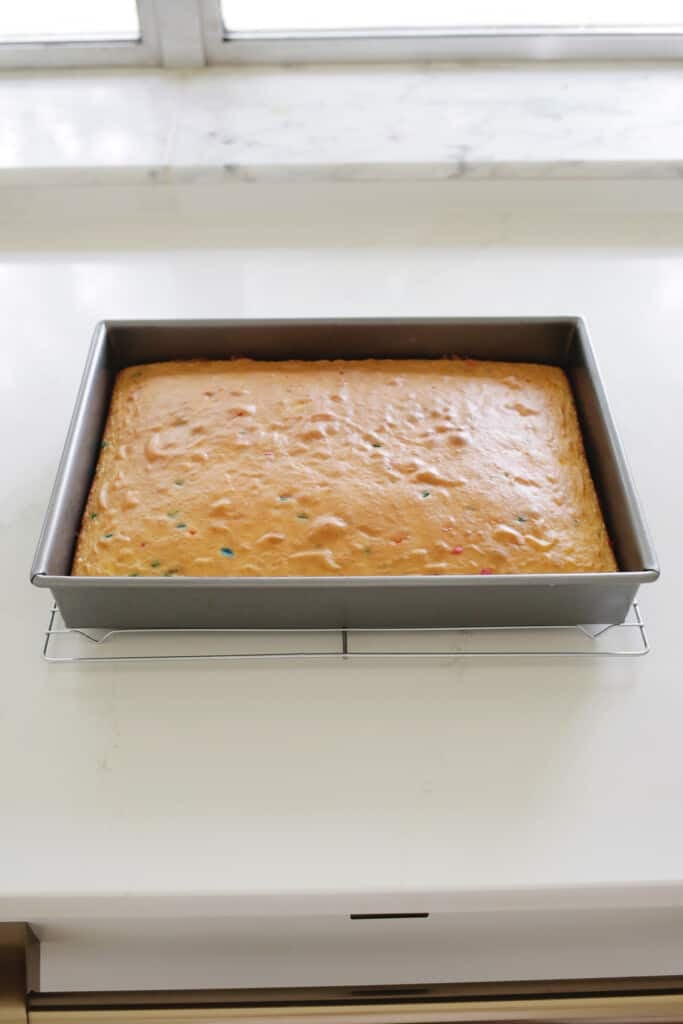
1. Bake the cake: Bake your cake according to package directions and let cool completely.
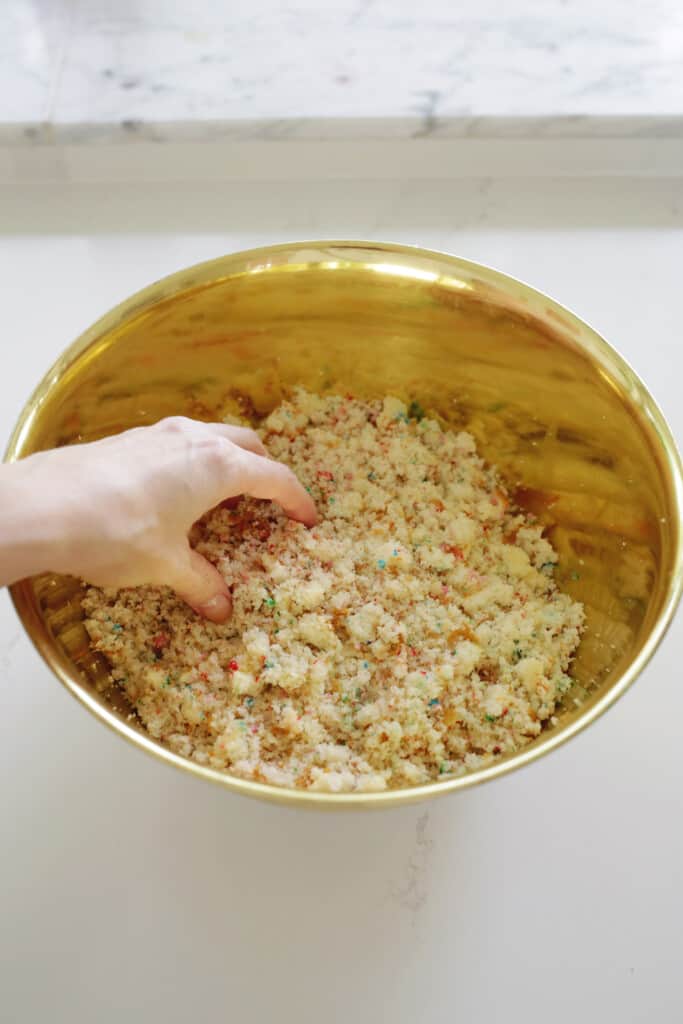
2. Add the icing and mix: Pour the cooked cake into a large mixing bowl. Add 1/2-2/3 of the container of frosting. Using the full container makes the cake pops a little too soft and harder to work with once we dip them in the chocolate. But that’s how you make the cake pops stick together, with frosting. Use clean hands to mix the frosting and cake. The cake pop dough will be quite soft, but moldable.
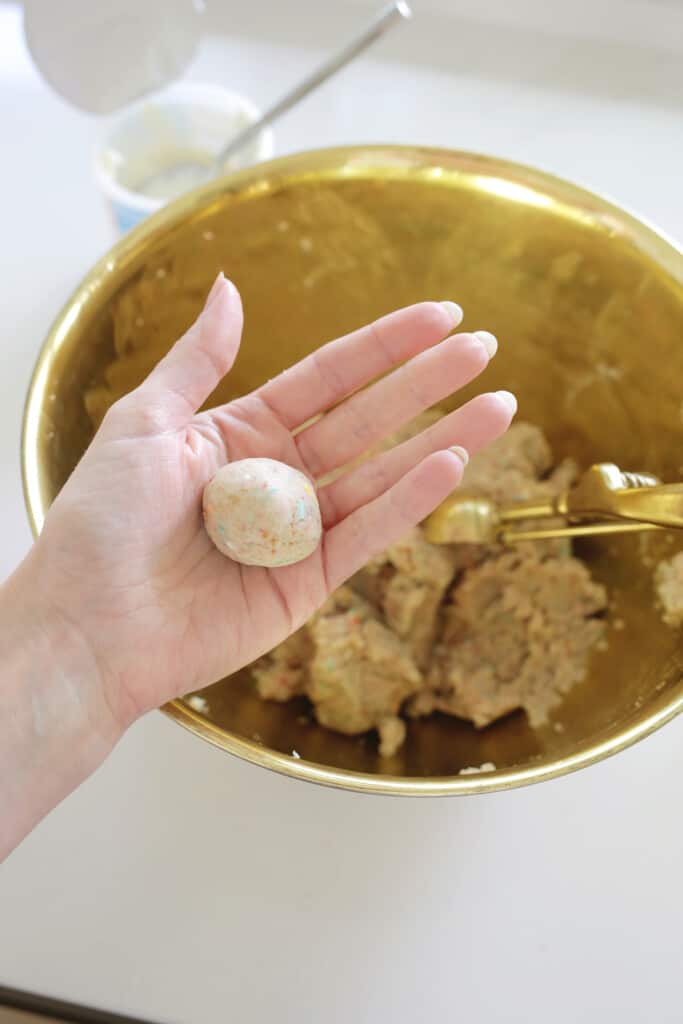
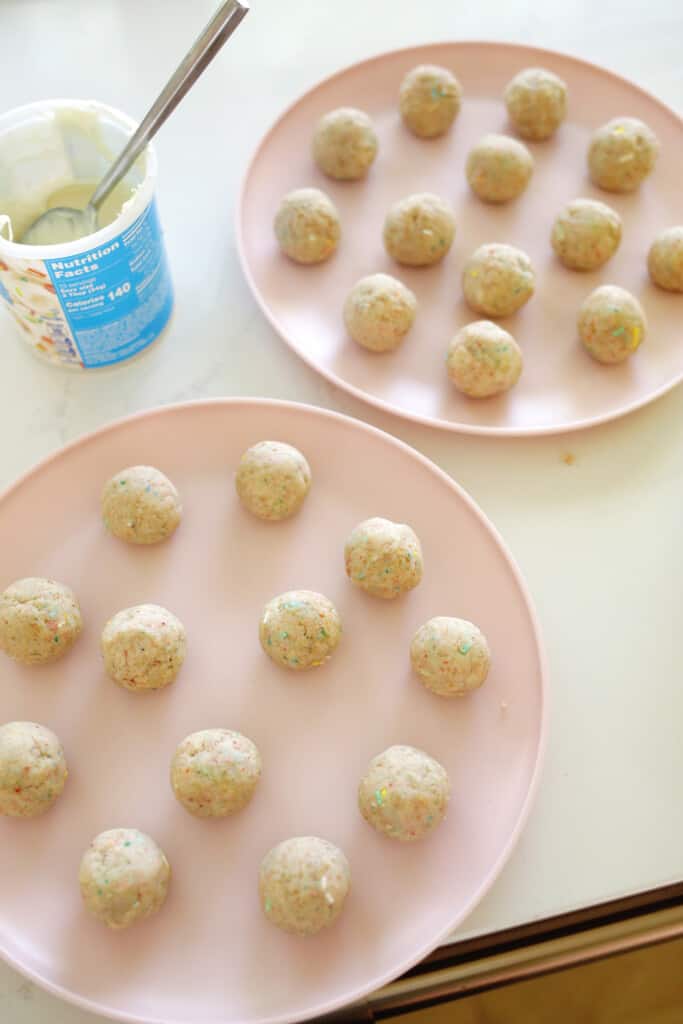
3. Rolling Cake Balls: Form your cake pop dough into small balls (about 3-4 tablespoons each). You don’t want them to be too big, just so they fit easily in the palm of your hand.
Once you’ve formed all of your pops (a standard size cake will make about 35-40 cake pops), place them in the refrigerator for 1-2 hours or the freezer for 30 minutes.

4. Melt your candy melts: Melt candy melts in the microwave in 30 second increments on half power. You can also use a bain-marie do it on the stove or a chocolate melter like this one. If you need to dilute your candy melts, you can stir in a teaspoon of canola or vegetable oil once melted and reheat the chocolate for 15 seconds at a time to remelt it if it starts to set at any time.
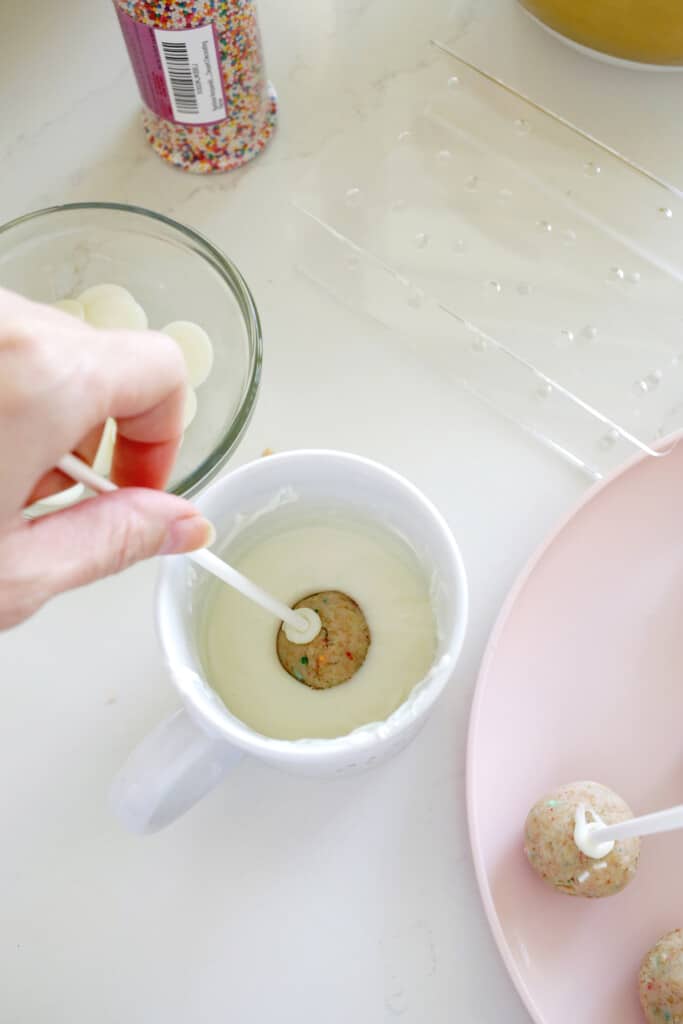
5. Attach the cake pop stick: First put your stick in the melted chocolate and push the stick 2/3 into a cold cake pop.
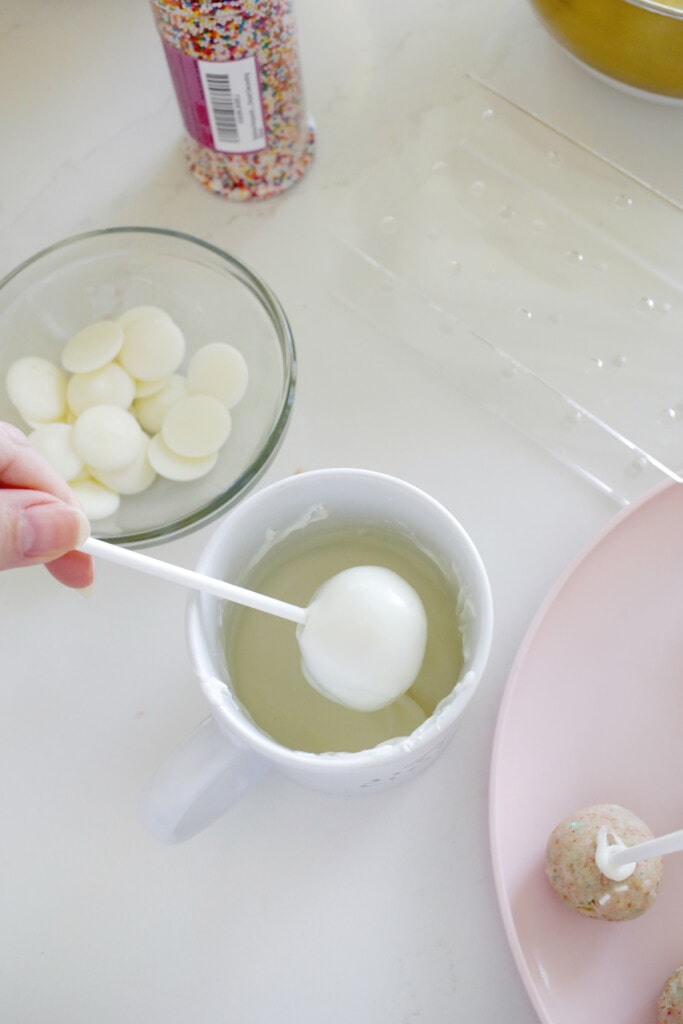

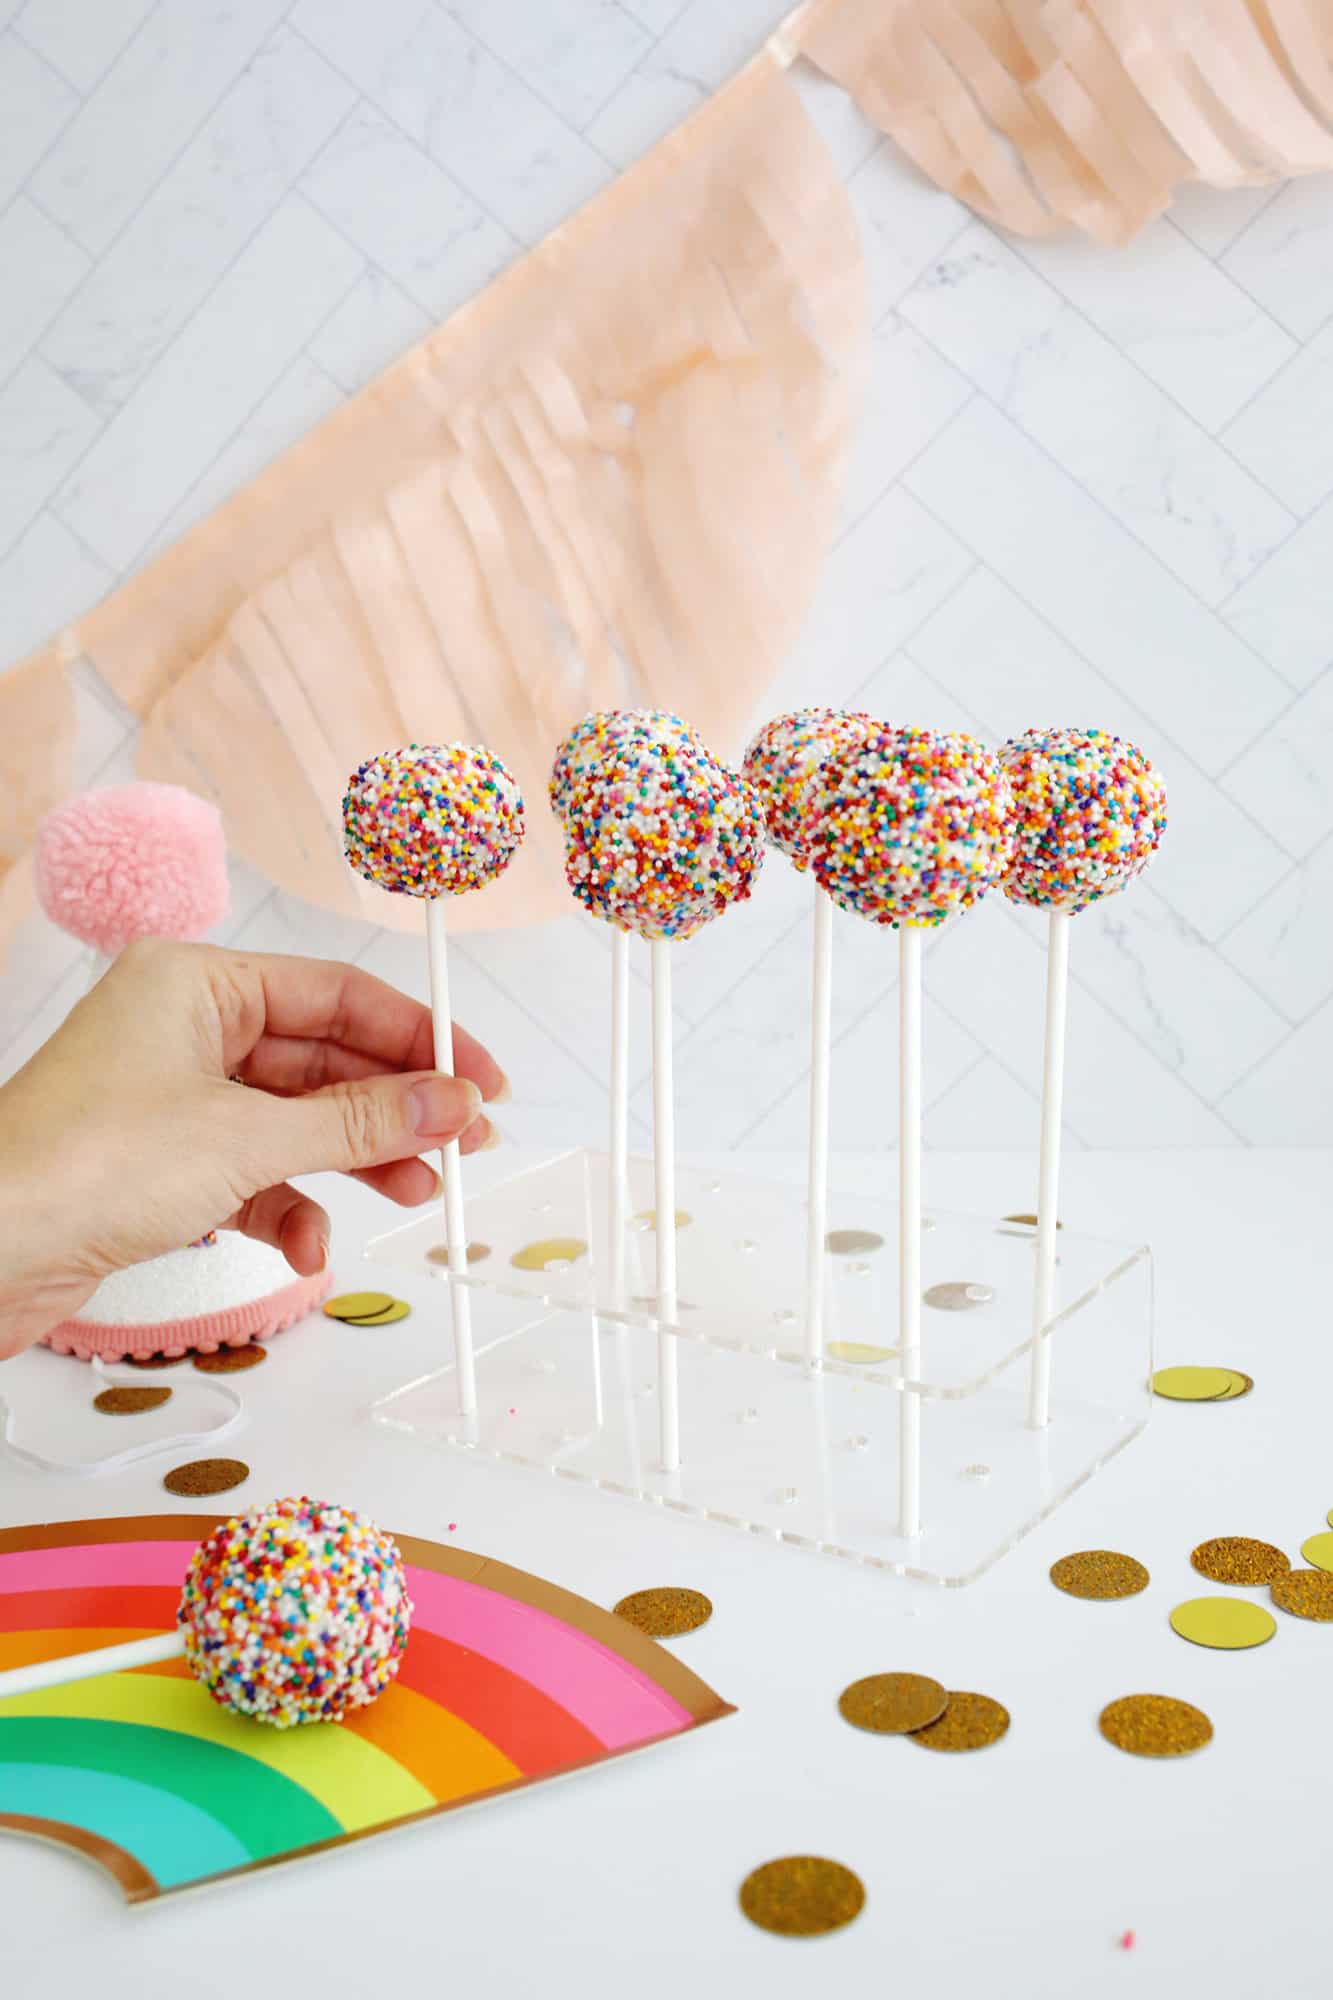
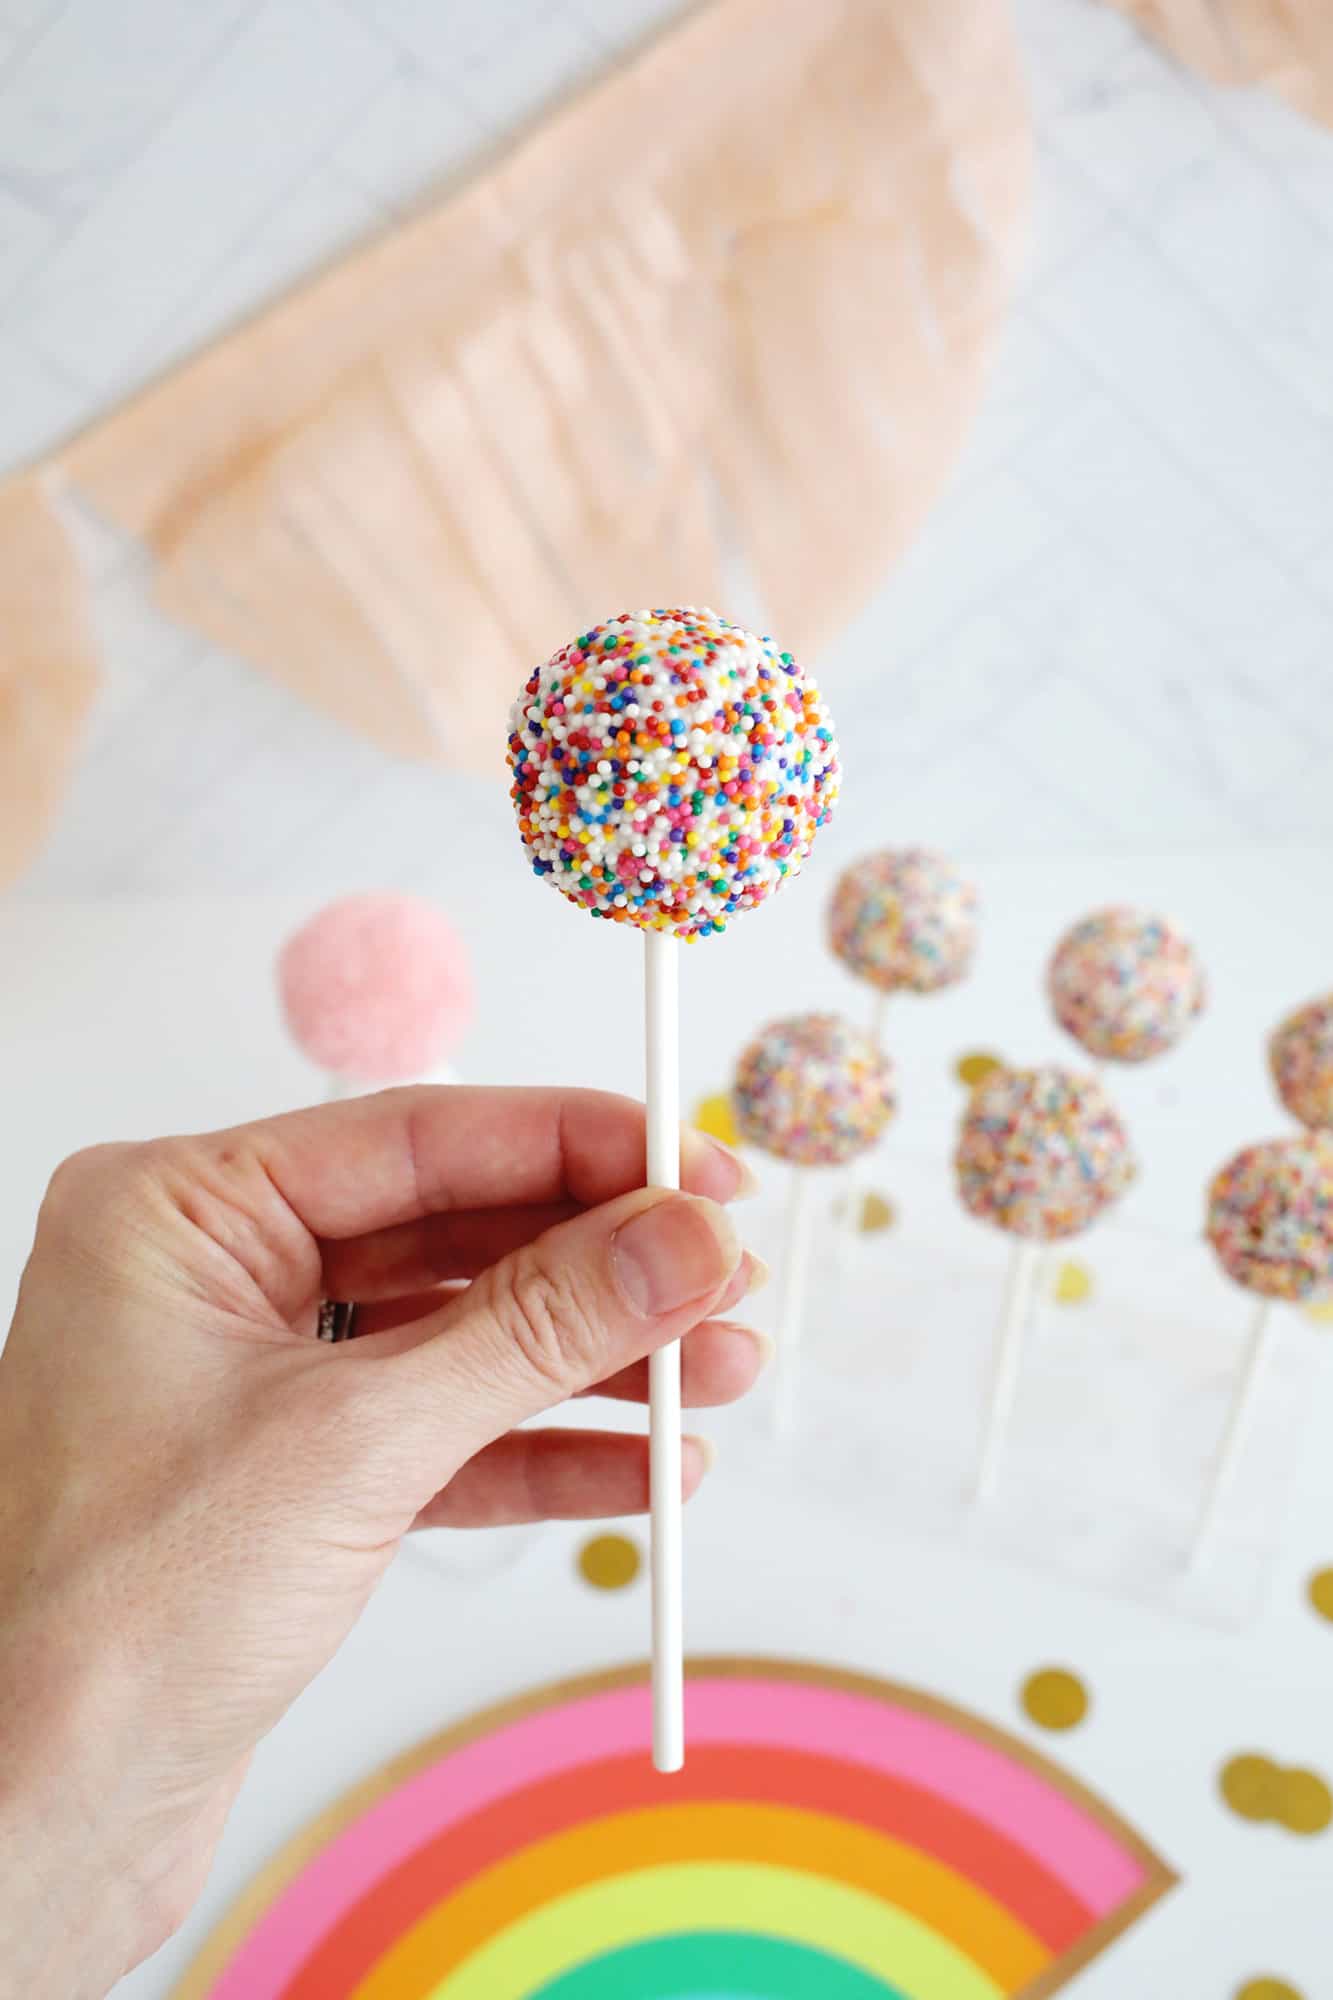
6. Dip the cake pop: Dip the attached cake pop into the melted chocolate and allow any excess chocolate to drip from the pop. Gently tap the cake pop stick on the side of your bowl to shake off the excess chocolate as well. Next, add the sprinkles and store the cake pop upright while it sets (unless you don’t mind a flat-bottomed cake pop).
You can add your sprinkles to a large bowl or plate to catch any extra sprinkles that fall and use them later.
While they dry, you can keep them upright in several ways, such as putting them in a container filled with granulated white sugar or rice or putting them in a Styrofoam block.

Want an easy, no-bake cake pop idea? Try using large marshmallows on a stick and get to decorating right away!
FAQs
Frequently asked questions
How do I store my cake pops?
If you make them ahead of time, you can store your finished cake pops at room temperature for 1 to 2 weeks. You can store them for up to four weeks in the refrigerator, but the cold can create condensation on your decorations and cause them to bleed or warp a little.
Can I use white chocolate chips instead of melting wafers?
Although candy melts work best for cake pops, you can also use chocolate chips instead. The mixture will be a little thicker and slightly harder to work with (but still OK). And the shell around the cake pops will be thicker once the chocolate has set.
Looking for other sweet treats for the party?
Get our FREE recipe guide with our the most popular recipes of all time!

Free Popular Recipe Guide
Our 25 best recipes of all time!
 Get the recipe
Create fun birthday cake pops for your next party!
Instructions
1. Bake the cake: Bake your cake according to package directions and let cool completely.
2. Add the icing and mix: Pour the cooked cake into a large mixing bowl. Add 1/2-2/3 of the container of frosting. Using the full container makes the cake pops a little too soft and harder to work with once we dip them in the chocolate. But that’s how you make the cake pops stick together, with frosting. Use clean hands to mix the frosting and cake. The cake pop dough will be quite soft, but moldable. It should resemble a playdough consistency.
3. Rolling Cake Balls: Form your cake pop dough into small balls (about 3-4 tablespoons each). You don’t want them to be too big, just so they fit easily in the palm of your hand. Once you’ve formed all of your pops (a standard size cake will make about 35-40 cake pops), place them in the refrigerator for 1-2 hours or the freezer for 30 minutes.
- 4. Melt your candy melts: Melt candy melts in the microwave in 30 second increments on half power. You can also use a bain-marie do it on the stove or a chocolate melter like this one. If you need to dilute your candy melts, you can stir in a teaspoon of canola or vegetable oil once melted and you can reheat the chocolate for 15 seconds at a time to remelt it if it starts to set at all moment.
5. Attach the cake pop stick: First, put your stick in the melted chocolate and push the stick 2/3 into a cold cake pop.
6. Dip the cake pop: Dip the attached cake pop into the melted chocolate and allow any excess chocolate to drip from the pop. Gently tap the cake pop stick on the side of your bowl to shake off the excess chocolate as well. Next, add additional decorations and store the cake pop upright while it sets (unless you don’t mind a flat-bottomed cake pop).
Remarks
Tips for Making Cake Pops:
-
- Add your frosting to your cake crumble in small amounts so that you have just enough for it to stick. It should look like playdough.
-
- Make sure your cake balls are thoroughly cooled before coating them.
-
- Have your decorations nearby and ready so you can attach them while the chocolate is still melted.
-
- You can use a tall glass to pour your melted chocolate into (or melt it in a microwave-safe mug) so you have a small reservoir in which to completely submerge your cake pop.
Nutrition
Nutritional intake
Birthday cakes
Amount per serving
% Daily Value*
*Percent Daily Values are based on a 2,000 calorie diet.
Note: Nutrition is calculated automatically using Spoonacular, for your convenience. Where applicable, we recommend using your own nutritional calculations.